Showing posts with label Samples: Home Decor. Show all posts

Thursday, May 23, 2013

Spring Sampler Wall Art


The boys helped me make this simple spring display on our kitchen frame.  We used the adorable Spring Sampler stamp set from the Spring Catalog.  The images are stamped in Early Espresso on Crumb Cake cardstock punched in scallop circles.  Then we used colors from the Artisan Embellishments Kit because it matched the framed art I made for a shelf nearby.


Then we mounted the spring images on paper doilies, also in the Spring Catty!  The Spring Catalog ends May 31st.  If you would like to order any of these supplies or anything else from the Spring Catalog, contact me soon.  :)


Friday, April 26, 2013

Artisan Embellishments Kit ~ Spring Catalog


One day I was in the mood to use the Artisan Embellishments Kit from the Spring Catalog to make a card.  But the next day I was decorating our kitchen for spring and needed "something".  I decided to frame the card that I made the day before and to revolve the color scheme around it. 


Wednesday, March 13, 2013

Oval Punch Egg Banner


Sometimes crafty projects just seem too easy.  I decorated the house for Easter yesterday, and had to find some "quick fixes" since I'm a little behind from company, sickness, and injury, LOL.

For the banner frame downstairs, I decided to just punch little paper eggs with my large oval punch.  I used new SU designer papers from the Spring Catalog.

Supplies:

Extra Large Oval Punch
Tea for Two Designer Series Paper

I'm tempted to punch more eggs for my big frame in the kitchen but I'm not sure yet.


Wednesday, December 5, 2012

Snow Festival Decor ~ The Bathroom


I still have no regrets about doing our bathroom all in white so I can decorate in color.  :)  It's so fresh and bright.  I love it!

For Christmas, I used Snow Festival products....again!  I framed Snow Festival designer paper and matted one of the felt ornaments.  It's so sharp looking!

On the shelf, I did white and silver with a touch of green...using Gumball Stitched grosgrain.  Ribbon makes everything better!  :)


This may look boring to some.  But there's just something about simplicity that appeals to me!  :)

Sunday, December 2, 2012

Snow Festival Christmas Decor


There's no hiding how much I love SU's Snow Festival products in the Holiday Catalog.  :)  We put Christmas decor up yesterday, and I found myself reaching for my Snow Festival goodies several times!  The  Cherry Cobbler red matches our "subtle, organic" theme so well!

Not only did I put our framed art up on the shelf in our kitchen, but I used one of the felt ornaments on the tin above our stove.  I switch things out for the tin all the time.  All I have to do is hot glue a magnet to the back.  :)


Next I will show you how I used Snow Festival in the bathroom.  :)

Thursday, November 22, 2012

Happy Thanksgiving ~ Home Decor


These are a couple decor items we did around the house with SU supplies.  They were quick and easy.

We used the Autumn Accents die in the Holiday Catalog to make leaves for our big black frame in the kitchen.  Typeset Alpha dies were used to cut out THANKFUL in Orchard Harvest DSP.  The boys and I wrote out things we were thankful for on the vanilla leaves.


And here I framed one of the big leaves the boys brought in to me.  I used Howlstooth and Scarringbone DSP from the Holiday Catalog as a back drop.  :)  I have gotten so many compliments on this simple decor.

I hope you all have a fantastic Thanksgiving with your family.  I am ever so thankful for all of you who have kept me excited about stamping for more than a decade!!!  Stay tuned for my own possible Black Friday deal tomorrow!  :)

Wednesday, October 10, 2012

Embellished Collage Frame


I love embellishing these photo collage frames!
I should have dusted BEFORE I took the pictures.  It's all better now.  ;)

This black one was perfect for some Halloween embellishing.


I used these Stampin' Up! products from the Holiday Catalog:

Howlstooth & Scaringbone Designer Paper (p. 24)
1/2 Striped Satin Ribbon (p. 26)
Flourish Designer Frame (p. 6)

And these products are from SU's Annual Catalog:

Owl Punch (p.185)
Petite Pennants Builder (p. 185)
1-3/4" Scallop Circle Punch (p.184)
1/2" Circle Punch (p.184)
1/8" Taffeta Ribbon in Black (p. 172) 
Glimmer Brad (p. 174)

Have you done any collage frame embellishing yet?

If you need any supplies, I am putting in orders this week!  :)  The catalogs can be seen from my sidebar.

I will include both the Annual & Holiday Catalogs in all $25 orders.:)

I am linking to:

Monday, September 24, 2012

October Class ~ Christmas Framed Art $18


UPDATE:  This is now just offered as a "take-home kit".  If you are long-distance and want to participate, please contact me to discuss options.  Thanks!

COST:  $18 including frame (1 punch)
RSVP:  Sign-up and payment deadline is Mon, Sep 31st, while class supplies last.

The center piece is from designer paper, and everyone's will have a different image.  You will be able to choose your image in the order that I received your payment.  So pay first, and you get first pick!  :)  All of them are cute though!  ;)


Use this framed art to decorate your own home this holiday season.  Or give this away as a gift!  If you keep this for home, you can change out the artwork with the seasons!  :)  That's why you just might need TWO frames, one for a gift and one for YOU!  :)

Monday, July 2, 2012

DIY Card Display Board


I've been meaning to show you my "did it myself" card display board.  Isn't it fun?!  I knew I wanted to go with some kind of ribbon board and read that I could make one with a covered cork board.  But I wasn't so sure about the criss-crossing diamond patterned ribbon kinds.  Then one day at Kohl's I saw a ribbon board with the ribbon going straight across.  Ahhh, that was much more my style.  Not so much chaos.

I got a large bulletin board from Freecycle, yay! 

I got some fabric at Hobby Lobby because SU's fabric wasn't going to match well, and I needed a really good match because the board is right next to my patchwork curtains.  It easily could have ended up looking really busy and crazy.  But this green with a subtle pattern worked great next to the curtains.

Then I took SU satin ribbon and starting tacking it across the board, securing it to the back with more tacks.  I also colored the tacks green with a sharpie marker.  :)

Right now I put cards from other stampers on this board and most of these cards are made by the lovely and talented Holly in California!!!  She does AMAZING layering and coloring work.  She is my stamping hero!!!  She works crazy hours as a nurse, is a mom and a wife, and somehow manages to pump out very labor and time intensive creative artwork.  She does guest design work, teaches classes at local stores, and takes art classes to improve her already impressive skills.  She's a machine!  Thank you, Holly and all my other stamping friends for the wonderful cards that you send me.  :)

Friday, June 29, 2012

In-Color Pinwheels


I made some paper pinwheels for our summer decor.  Yep, that's milk glass vases.  Don't they look so fresh and nice with the colorful pinwheels?!  Makes me want to hit an antique store RIGHT NOW!  ;)


 I even used the coordinating In-Color designer brads.  They are so cute. 


This has me thinking....I think I want to do a 2011-2012 In-Color Share similar to the 2012-2013 In-Color Share we just did.  Offering the 12x12 was a hit, and I would love to do some scrapbook pages in these colors.  Would you!?

I am linking to:


Thursday, April 5, 2012

Nursery Suite Easter Decor

The Nursery Suite DSP has all the pastels that are perfect for Easter.

Here I framed a piece with two little birds. All I had to do was cut the paper down and frame it. EASY!


And here I used the Large Oval Punch to make paper Easter eggs. They could be embellished with pearls and buttons and ribbon if you wanted! The little clips and hemp twine are also from SU.


Have a happy day!

Thursday, January 26, 2012

Stretching the January Sampler & Valentine's Decor!


I strung punched Large Hearts on my white frame last night, using the Twitterpated DSP in the Occasions Mini.

But guess where I got the DSP? From my January Sampler (aka Scrap Kit, aka Card Kit)! I pushed the punch in as far as I could.


Then there was still enough border to put my white journaling cards on top!


You can do this little trick to punch out accessories for your cards, your scrapbook pages, or for home decor like me!

Friday, January 13, 2012

Everyday Enchantment Wall Art Kit $10


I made this wall art up this morning for upcoming Valentine's Day. But it would work for anytime, really. I used the Everyday Enchantment papers from the Sale-A-Bration brochure and the new Pleated Satin Ribbon from the Occasions Mini. I love the vintage look here!

Below the pleated ribbon is a scallop edge done with the Tasteful Trim Die.


I cut out "LOVE" using my Serif Essentials dies. The letters are embellished with a designer button, new Baker's Twine, small punched heart, and the new Pool Party Seam Binding from the Occasions Mini. And the vanilla mat is dry embossed with the Stripe Folder.


Below are the supplies needed to make this. OR you can purchase a kit from me for just $10! All pieces except the frame are included. Please let me know by Friday, Jan 20th if you would like one. :)

Enchantment DSP: Free with $50 purchase (126144)

Serif Essentials Alphabet Dies: $149.95 (113464)
Tasteful Trim Die: $42.95 (120893)
Stripes Folder: 7.95 (123128)
Pleated Satin Ribbon Pear: $6.95 (125568)
Pool Party Seam Binding: $6.95 (125582)
Vanilla Cardstock: $8.50 (101650)
Small Heart Punch: $5.95 (117193)

This fits an 8x10 frame, just like the Christmas Countdown we did. I hope to offer more 8x10 home decor as the year goes on so find a fun frame that you can change up with the kits if you haven't already! Mine is from a thrift store for 97 cents, and I painted it black. How fun is that?!


Thursday, January 12, 2012

Command Central: Scallop Square Cork


Another late night of Nate Berkus catch-up led to another late night project. I have a teeny weeny workspace at the kitchen counter, under the microwave. There's a couple baskets, file folders, etc. And my menu was on the wall here. But my calendar and work lists were over at the frig. Nate inspired me to put it all in one place. And I really loved getting my frig completely cleaned off.

So I pulled out some chalkboard vinyl leftover from last year's Sale-A-Bration promotion, my Big Shot, SU cork sheets, and my Scallop Square Die.

Now I can pin up my little lists: House Projects, Errands, Groceries, & Menu. There's a place for notes. And then I rigged up one of my favorite mini calendars from Michaels.

I adhered the cork with SU's sticky strip. So far so good.


I bet I have the smallest Command Central on the planet, but it's organized so that's all that matters to me! ;)

Friday, December 23, 2011

Holly Berry Bouquet Bunting


To avoid having to bake and cook today, I decided that the livingroom mirror needed a little Christmas cheer. HA! So I tore strips from SU's Holly Berry Bouquet fabric, tied knots along twine, and draped it over the top of the mirror. Then, it was onto baking. ;)

Now I would rather be decorating packages...but alas I am still baking 12 hours later.

Monday, December 5, 2011

Framed Every Little Bit Tags


I made a simple tag banner and framed it.  

Supplies include:

Hemp Twine
Every Little Bit Stamp Set
SU Markers
Liquid Glitter
Letters to Santa DSP
Circle Punch
Modern Label Punch
Clothespins

Here is a close-up.  Click to see the glitter up close.  :)


Have a great week!

Tuesday, November 15, 2011

Framed Autumn Spice Pennant

I framed some white fabric (a burp cloth) and strung SU hemp twine across it. Then I punched pennants out of Autumn Spice DSP and card stock using the Pennant Punch. The pennants are clipped on with SU's clothes pins. And I tied SU ribbon between the pennants: grosgrain, polka dot grosgrain, and ruffled ribbon. My stampers are greeted by this on their way down to the classroom. :)

Monday, October 24, 2011

Autumn Spice Tray

I used SU's Designer Paper on my mini tray centerpiece at the kitchen table again. This time I used Autumn Spice.

That's also SU grograin ribbon tying the napkins. I bought them on clearance last year with the intention of covering pillows. I don't think I'm going to do that now so I'm keeping them for napkins this year. :)


The little gourds are real, and I coated them with petroleum jelly to preserve them longer. Last year my little pumpkins lasted until Christmas easily. And they look nice all shiny, too.


Have a great week!

Sunday, August 28, 2011

Nautical Expedition Decor

For the summer, I was inspired by the Summer Mini's nautical theme for home decor. I decided to use it in the bathroom.

I punched out images from the DSP, mounted them on white card stock, and framed them for this shelf.


And I used a large portion of one of the DSP sheets to frame in 8x10. Now that's some easy art! Jeff really liked this.


Today it's feeling more like Indian Summer, and it's kinda nice! :)

Wednesday, March 30, 2011

Scallop Circle Die


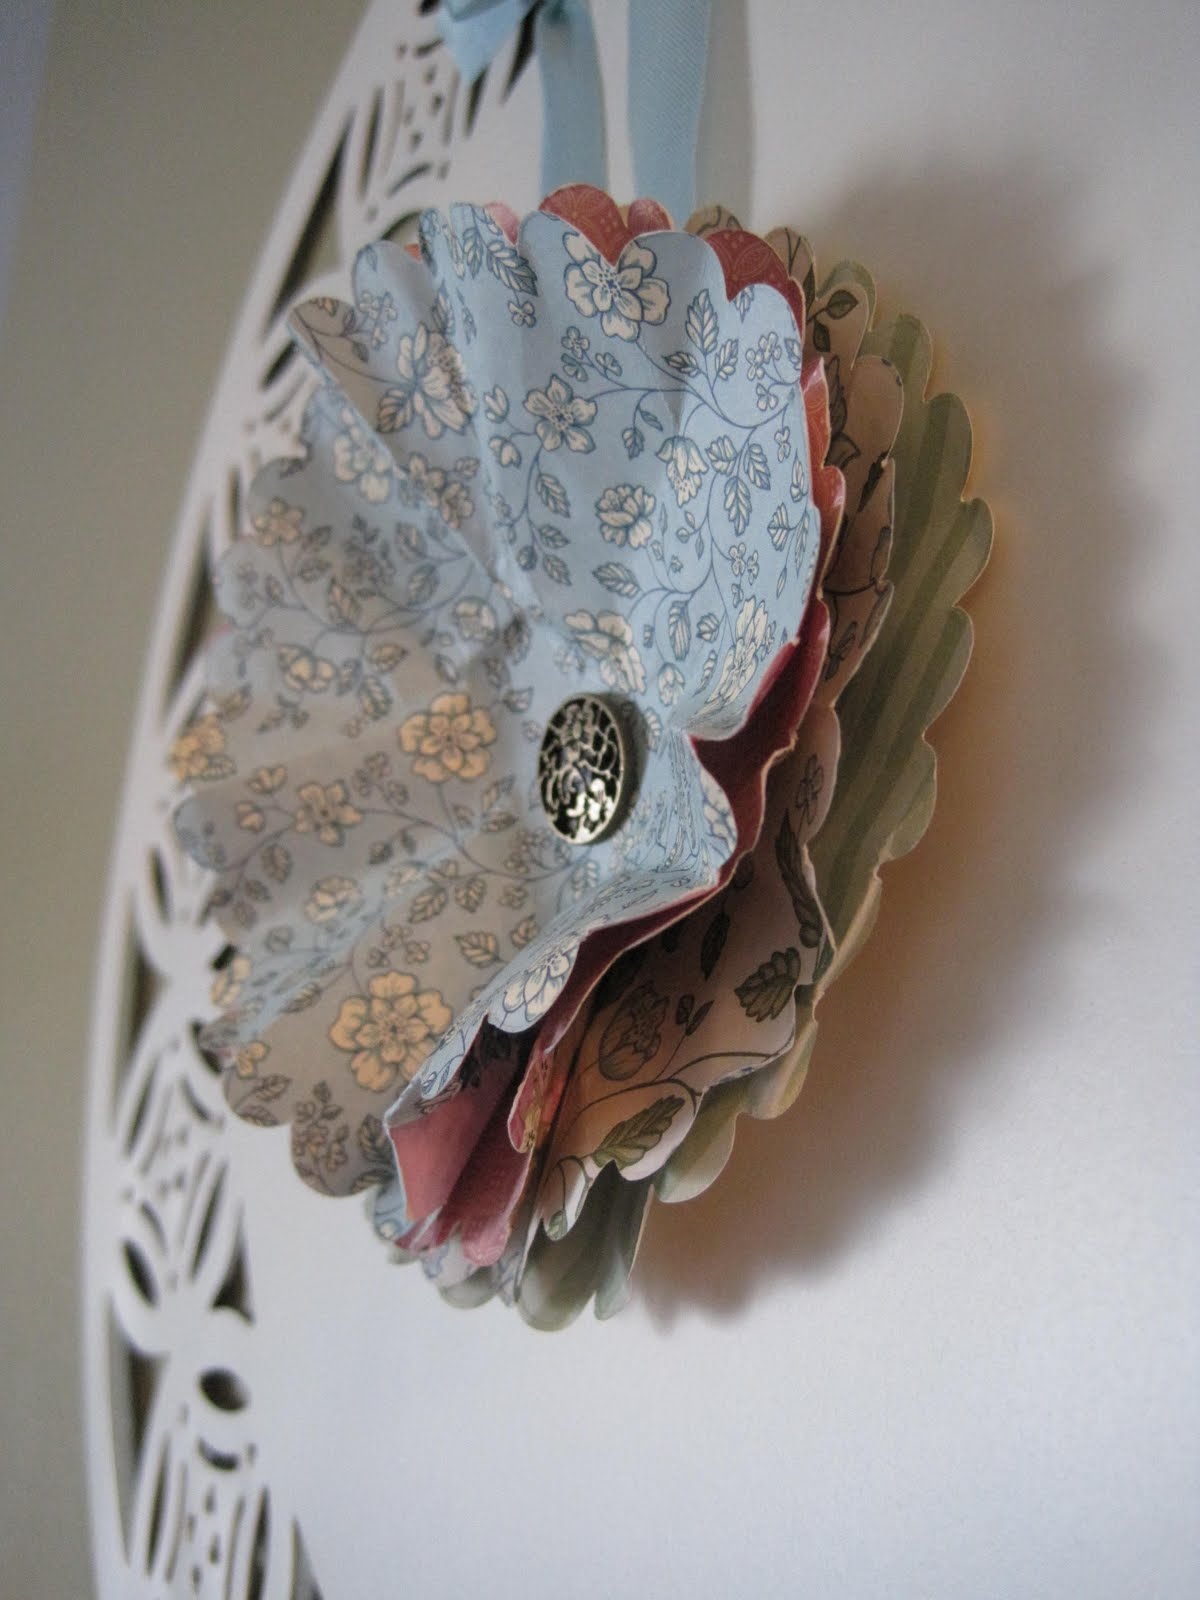
I used the Scallop Circle Bigz Die and cut out several layers in the Spring Vintage DSP. I attached all the layers with a vintage brad in the center. Then I crinkled all the papers. We have done this on a smaller scale to make small flowers with the scallop circle PUNCH. But I wanted a larger scale flower to display on my wall charger plate.

Here are the layers up close:


Then I adhered the flower to the plate with SU Baja Breeze Seam Binding. This was perfect for adding blue to my home decor for Spring. :)